almost Beta
  • Holozoo_08

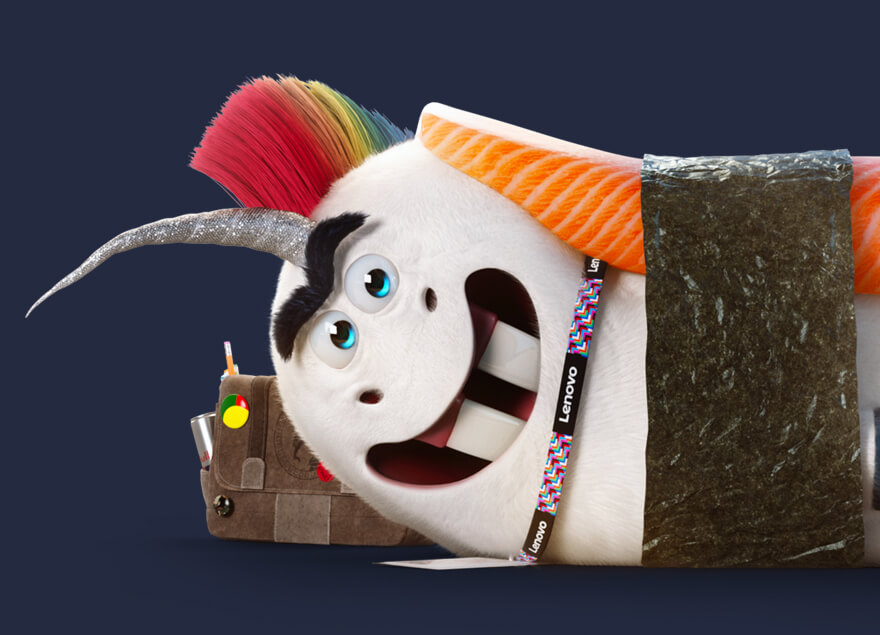
    Starting to polish up, still fixing some textures and lighting issues. I've been using 2 different computers to work at and trying to figure out how the image looks on their monitor colours. I might have to up the blue saturation as it was looking a bit dull. The back ground seems blank and unfinished so I'll look into filling it up with either a crowd or some technical wiring. I always like the cleaning up stage, everything is slowly coming together 

    Avatar for Daniela  Naumovski
    Daniela Naumovski
  • CONCEPT

    My final entry in the contest is titled “Connection.”

    This image shows the precise moment in time when I capture my daughter’s undivided attention, and the instance when our souls become one in the quest for answers to existential questions pertaining life and the world.

    I am the figure in metal armor, which represents the old: my parents’ legacy and those teachings they thought would help me survive and improve upon society. Yet, the “weapons” and the “tools” they equipped me with are now inadequate or insufficient. In today’s fast changing world, technology and emotional sensibility play a major part in the repertoire of behaviors my daughter will need to move forward. In the history of mankind, the essential premise has remained unchanged from generation to generation: to evolve we must be ready to adapt and absorb the new.

    In “Connection,” my daughter and I are suspended in time, undergoing a prodigious epiphany: it is the moment I use technology and connectivity to drive the generational message home. If I expect my child to evolve, respect others, be capable of self-respect, and find emotional balance, I must show her how to “connect” with herself and with others, both emotionally and within the framework of today’s technological advances. The scene attempts to carry the message that in today’s world, technological and emotional sensibility go hand in hand and are essential to reach a higher level of civilization.

    I hope I have succeeded in making my concept clear. Today, Catalina is my legacy, and the two characters aim at representing a world in constant evolution: what was, what is, what will be.

    It was my pleasure and privilege to participate in this contest.

    Warm regards to the THU team,

    Juan Martín


    ....................

    Español:

    Mi trabajo se llama CONEXIÓN.
    El instante perfecto donde logro captar la atención de mi hija.

    Allí estoy yo, con mi armadura vieja que representa mi estructura. Alguna vez fui el legado de mis padres y ellos me prepararon con ideales para sobrevivir en un mundo en el que ellos consideraban mejor, pero tal vez hoy ese mundo no es el mismo que deseamos para nuestros hijos.

    Mi esfuerzo es constante, con otras ideas instaladas desde pequeño, trato de hacer un equilibrio para lograr conectarme y luego comunicar a mi hija Catalina con enseñanzas que le permitan vivir en un futuro mejor. Como ocurrió siempre, generación tras generación. 

    En ese momento trato de utilizar la tecnología y la conectividad para transmitirle información que la prepare a ella como “ser” integrante de una sociedad evolucionada, que sepa respetar al prójimo, pero también que sepa respetarse a sí misma. Y a partir de allí, desde un equilibrio interior, logre transitar su vida siendo parte de una sociedad con la “sensibilidad” para conectar, emocional y tecnológicamente, con la responsabilidad y el compromiso necesarios para bucear en los beneficios del desarrollo, sin perder de vista el cuidado del entorno que la rodea.

    En algún momento eran “las armas” para luchar, en otro momento “las herramientas” para trabajar duro, en los tiempos que corren, es la tecnología y la sensibilidad emocional lo que nos permitirá llegar a una sociedad más “elevada”.

    Espero que se logre entender el concepto planteado. Hoy Catalina es mi legado y estos dos personajes son los representantes de una sociedad en constante evolución. Lo que fue, lo que es y lo que será.

    Fue un gusto participar de este concurso por el Golden Ticket.

    Muchas gracias a todo el equipo de THU

    Juan Martín Bueno


    Avatar for Juan Martín Bueno
    Juan Martín Bueno
  • main characters lineart

    I went ahead and finalized the lineart for the characters in the foreground. I will still make small changes and add details, but now I can also start color blocking and integrate them into the background.

    Avatar for Gabriela Sá
    Gabriela Sá
  • new world in far galaxy

    In the far far from our galaxy there is another galaxy... a different world with different structures and spaceships
    There is a world between the sky and sea...spaceships can fly and swim. there is no limitation between them only a very slim skin acts as a border...u can go from one place to another in the blink of an eye.
    Spaceships break this boundary and go wherever and whenever they want.

    All this happened after a huge scientific revolution and human was able to achieve the technology of traveling in the galaxy and far away.
    As you know, there is always a need for an energy source and there is a planet full of new energy in this galaxy where all the ships are coming to replenish energy.

    Avatar for amir garusian
    amir garusian
  • Phase III: Clarity

    The fun part starts when all the tests come together to create a solution that provides conceptual clarity. The modeling starts to flow, and you start experimenting and having fun with your project.

    Avatar for Janisse Espinoza Yañez
    Janisse Espinoza Yañez
  • Phase II: Concept and Forms.

    The selection of organic forms has been a significant difficulty in terms of flexibility to the basic concept, till obtaining equilibrium. Preventing the obvious from being detected in an artistic concept has been one of the most difficult obstacles I've faced so far, but I've managed to realize the relationship between the entire project.

    Avatar for Janisse Espinoza Yañez
    Janisse Espinoza Yañez
  • Raw render

    Here is the raw render!
    I'll probably work on some small details before jumping into photoshop, but it's time to give some life to it!

    Avatar for Tiago Sousa
    Tiago Sousa
  • Step 6: Artwork

    <div class="lexxy-content lightbox-container"> <p>Cool! We are done, after having the concepts, the sketches, the vectors and the colors finished, the last thing that remains is to finish the piece and apply it where it corresponds.</p> <p> </p> <p>If the illustration is done for a production line it is recommended that you use a mockup to see how the printed piece should look.</p> <p> </p> <div class="lightbox-container"> <p>That's all I have to say about it, thanks for reading, watching and parning. Feel free to contact me if you have questions and follow me on </p> <a href="https://www.instagram.com/jhonny_studio/"><strong>Instagram</strong></a><p> and </p> <a href="https://www.behance.net/dblackhand"><strong>Bēhance</strong></a><p> to see my most recent projects.</p> <br><p> </p> <br><p> </p> <div class="pswp-gallery lightbox " data-controller="lightbox" data-lightbox-target="container"><div class="lightbox__item"><a target="_blank" data-lightbox-target="item" href="/rails/active_storage/blobs/redirect/eyJfcmFpbHMiOnsibWVzc2FnZSI6IkJBaHBBcmVNIiwiZXhwIjpudWxsLCJwdXIiOiJibG9iX2lkIn19--4e98bda1593baf3e9dd36c88db4b76056b855404/Jhonny_Nu%CC%81n%CC%83ez_Illustration_Golde_Ticket_2022_7.png"><img alt="" loading="lazy" src="/rails/active_storage/blobs/redirect/eyJfcmFpbHMiOnsibWVzc2FnZSI6IkJBaHBBcmVNIiwiZXhwIjpudWxsLCJwdXIiOiJibG9iX2lkIn19--4e98bda1593baf3e9dd36c88db4b76056b855404/Jhonny_Nu%CC%81n%CC%83ez_Illustration_Golde_Ticket_2022_7.png"></a></div></div> </div> <p> </p> </div>
    Avatar for Jhonny Núñez
    Jhonny Núñez
  • Step 5: Color

    We have left the most critical phase of the project, and now we enter the most fun part, making the vector art.

    In this part of the creative process I am not making vectors and putting color on them as you might think, first I draw all the lines without a background color, only a stroke color (each object of the composition with a different color to identify them faster) then I fill them white and then I start to cut, edit, move, fix all the details that may be out of place.

    The palette I chose is cheerful, vivid and immediately catches the eye.

    Avatar for Jhonny Núñez
    Jhonny Núñez
  • Step 4: Vectors

    We have left the most critical phase of the project, and now we enter the most fun part, making the vector art.

    In this part of the creative process I am not making vectors and putting color on them as you might think, first I draw all the lines without a background color, only a stroke color (each object of the composition with a different color to identify them faster) then I fill them white and then I start to cut, edit, move, fix all the details that may be out of place.

    Avatar for Jhonny Núñez
    Jhonny Núñez
  • Step 3: The Final Sketch

    Very well! Hold on, the rapids are coming! It is not always as easy as I am making it seem in this case of the creative process, on many occasions I can have a nice sketch in clean lines that in the end I do not like because it seems to me that I am using too obvious solutions.

    This is one of those cases, although I really like the first sketch, I can't help but feel uncomfortable with the general idea, I feel like I'm using an already established element and just decorating it. Do you see that huge recycling symbol there? My intention was to portray sustainability but I think I failed. that's why I made a series of modifications using the first starting sketch. The result? the badass sketch number 2.

    Avatar for Jhonny Núñez
    Jhonny Núñez
  • Stp 2: The Sketch

    The Mood Grid has saved me a lot of time, when I have my ideas and concepts in order I don't need to waste time on rough sketches trying to come up with a solution.

    In this case I already know that the objects I need to illustrate are: Nature, Sustainability and Time. That the values are: Equality, Diversity and Solidarity. That the place is the planet earth and that the people must be those who are usually underrepresented.

    If you are wondering why black lines and red lines, well, there is not reason, sometimes I just delete a black line and make a new one in red to see a clear difference.

    Avatar for Jhonny Núñez
    Jhonny Núñez
  • Step 1: The Mood Grid

    All my projects in this way, using a conceptuall and visual invention that I have baptized as Mood Grid.

    A Mood Grid is a 3 x 3 square template where I divide each row into groups of 3 squares, each row having a specific theme:

    1. Objects.
    3. Values
    3. People/Places.

    I then fill in each of the 3 boxes in each row with a visual reference that represents the topic of each row, I prefer to use photos to create the Mood Grid but if I can't find a photo that I like then I can use a pre-designed illustration. In this specific case, I set out to represent positive, current issues that I believe will benefit from 5G technology.

    Avatar for Jhonny Núñez
    Jhonny Núñez
  • Line work

    Hi everyone! Just finished the linework! Pretty content with the final result. I tried to give each character a story. A lot of stuff if happening here and many details are still missing :D
    Time to give color to this piece!

    Avatar for Alejandro Giraldo
    Alejandro Giraldo
  • The energy in us (whole vision)

    I always thought that it would be nice the energy from my everyday life to to charge not only me but also the world around me.

    Avatar for Zheni Pavlova
    Zheni Pavlova
  • The energy in us (placing the composition)

    To find the right place of the story, so that there is completeness and wholeness

    Avatar for Zheni Pavlova
    Zheni Pavlova
  • The energy in us (rough sketch)

    My approach is to tell a story through a short comic. And these are the first steps towards it.

    Avatar for Zheni Pavlova
    Zheni Pavlova
  • New Composition

    Then I came up with this composition and I liked it. So thought to move forward with it.
    I added diffrent things in this one, tried adding some lights near by the character (agent) and changed buildings and all.
    and at this point my scene was ready to take into Photoshop from Blender for the final composition.

    Avatar for Aman Gupta
    Aman Gupta
  • First composition, RAW

    I created this composition before, thought it was good but nope, once I rendered this scene I literally did'nt liked it so I changed few stuff in this and created another composition.
    Stick to my posts to see updated version of this

    Avatar for Aman Gupta
    Aman Gupta
  • (almost) final colors

    This is the colored version of the previous image, where you could only see the values. I can tell I'll have to revisit some colors, but I'll work on the characters next and only after that, I'll come back to this.

    Avatar for Gabriela Sá
    Gabriela Sá
  • working the values

    I used a B&W adjustment layer as I was coloring the background to make sure I got the values right (ish).

    Avatar for Gabriela Sá
    Gabriela Sá
  • 08 - Keyshot, Clay renders

    <div class="lexxy-content lightbox-container"> <p>Hey guys. </p> <p> </p> <p>I finally hit Exit in ZBrush. I was going back and forth so many times because of tiny things! I wasn't satisfied with the eyes so I kept adjusting and adjusting. Thank god for the ZBrush/Keyshot Bridge thingy, I have no words for how it was helpful in this process. </p> <p> </p> <div class="lightbox-container"> <p>Anyways, finishing my business in ZBrush means its time to set up my scene in Keyshot. Yay! After transfering the geometry, the first step was applying a stantard clay material to the entire model. This material that I created is pretty much just a grey diffuse material with high specular and a semi/matte roughness level - its really quick to adjust in the material graph and allows me to see the changes I'll make in the environment and lighting afterwards Otherwise I probably couldn't see the changes in the model right away, trust me, that's just counter-efective.</p> <div class="pswp-gallery lightbox " data-controller="lightbox" data-lightbox-target="container"><div class="lightbox__item"><a target="_blank" data-lightbox-target="item" href="/rails/active_storage/blobs/redirect/eyJfcmFpbHMiOnsibWVzc2FnZSI6IkJBaHBBbXFNIiwiZXhwIjpudWxsLCJwdXIiOiJibG9iX2lkIn19--7d077ca8d992a87ca5df67c9cc777f54a09c0d6f/2022-07-27%20(1).png"><img alt="" loading="lazy" src="/rails/active_storage/blobs/redirect/eyJfcmFpbHMiOnsibWVzc2FnZSI6IkJBaHBBbXFNIiwiZXhwIjpudWxsLCJwdXIiOiJibG9iX2lkIn19--7d077ca8d992a87ca5df67c9cc777f54a09c0d6f/2022-07-27%20(1).png"></a></div></div> </div> <p> </p> <p> </p> <p> </p> <div class="lightbox-container"> <p>Also, the shiny thingy applied to the model in this screenshot is the material I created. It looks like this because I had performance mode on to speed my navigation but as soon as I turned it off it turned into normal clay. Pretty cool feature huh?</p> <div class="pswp-gallery lightbox " data-controller="lightbox" data-lightbox-target="container"><div class="lightbox__item"><a target="_blank" data-lightbox-target="item" href="/rails/active_storage/blobs/redirect/eyJfcmFpbHMiOnsibWVzc2FnZSI6IkJBaHBBbXVNIiwiZXhwIjpudWxsLCJwdXIiOiJibG9iX2lkIn19--882df7e1b29327465d94cb3e23643ac90fc218df/2022-07-27%20(3).png"><img alt="" loading="lazy" src="/rails/active_storage/blobs/redirect/eyJfcmFpbHMiOnsibWVzc2FnZSI6IkJBaHBBbXVNIiwiZXhwIjpudWxsLCJwdXIiOiJibG9iX2lkIn19--882df7e1b29327465d94cb3e23643ac90fc218df/2022-07-27%20(3).png"></a></div></div> </div> <p> </p> <p>Then, after applying it to each material using the labels function in keyshot (this function allows to toggle the clay on and off as needed), I started adjusting the HDRI parameters right away.</p> <p> </p> <div class="lightbox-container"><div class="pswp-gallery lightbox " data-controller="lightbox" data-lightbox-target="container"><div class="lightbox__item"><a target="_blank" data-lightbox-target="item" href="/rails/active_storage/blobs/redirect/eyJfcmFpbHMiOnsibWVzc2FnZSI6IkJBaHBBbTJNIiwiZXhwIjpudWxsLCJwdXIiOiJibG9iX2lkIn19--5dc9e024ebef5ec180c25541014096329c1ff041/2022-07-27%20(2).png"><img alt="" loading="lazy" src="/rails/active_storage/blobs/redirect/eyJfcmFpbHMiOnsibWVzc2FnZSI6IkJBaHBBbTJNIiwiZXhwIjpudWxsLCJwdXIiOiJibG9iX2lkIn19--5dc9e024ebef5ec180c25541014096329c1ff041/2022-07-27%20(2).png"></a></div></div></div> <p> </p> <p>I picked a default one from Keyshots library and tweaked it untill i liked the result. Then I created a simple light setup with a front, top and bottom light and, of course, a rim light. There's something about rim lights that adds that sweet spiciness I like. Also, I wanna add that I worked with grayscale almost to the end of thisl lighting creation workflow because it helps to see if the whole composition is working or not. When I finished setting the lights, I gave them different tints. </p> <p> </p> <p>(HERE'S A LITTLE TIP: work with a dark background and with the HDRI in low brightness. Add each light separately and, when adjusting one, keep the others turned off. Trust me, it's a good way to see what each one is doing to the scene. )</p> <p> </p> <div class="lightbox-container"><div class="pswp-gallery lightbox " data-controller="lightbox" data-lightbox-target="container"><div class="lightbox__item"><a target="_blank" data-lightbox-target="item" href="/rails/active_storage/blobs/redirect/eyJfcmFpbHMiOnsibWVzc2FnZSI6IkJBaHBBbXlNIiwiZXhwIjpudWxsLCJwdXIiOiJibG9iX2lkIn19--3ba7e0f9cf7a73e73862431c95330a5bc900898b/2022-07-27.png"><img alt="" loading="lazy" src="/rails/active_storage/blobs/redirect/eyJfcmFpbHMiOnsibWVzc2FnZSI6IkJBaHBBbXlNIiwiZXhwIjpudWxsLCJwdXIiOiJibG9iX2lkIn19--3ba7e0f9cf7a73e73862431c95330a5bc900898b/2022-07-27.png"></a></div></div></div> <p> </p> <p>I also set up my cameras in between. Everytime I see a view I like, I save the camera.</p> <p> </p> <p>With my scene and lights set up as I wanted, I moved on to the next step - materials.</p> <p> </p> <div class="lightbox-container"><div class="pswp-gallery lightbox " data-controller="lightbox" data-lightbox-target="container"><div class="lightbox__item"><a target="_blank" data-lightbox-target="item" href="/rails/active_storage/blobs/redirect/eyJfcmFpbHMiOnsibWVzc2FnZSI6IkJBaHBBbStNIiwiZXhwIjpudWxsLCJwdXIiOiJibG9iX2lkIn19--6ed6c43e6dfcd23cfb6108e212f9fbdc266cabb1/Maria.3.jpg"><img alt="" loading="lazy" src="/rails/active_storage/blobs/redirect/eyJfcmFpbHMiOnsibWVzc2FnZSI6IkJBaHBBbStNIiwiZXhwIjpudWxsLCJwdXIiOiJibG9iX2lkIn19--6ed6c43e6dfcd23cfb6108e212f9fbdc266cabb1/Maria.3.jpg"></a></div></div></div> <p> </p> <p>This took me a while but I eventually got used to the interface and was able to sped up the process a lot (it's my first time using keyshot. Ever.) Eventually my teacher gave me a big big feedback that changed the look of the entire character! I was using ZBrush's polypaint on the skin (which is ok, obviously, but I was completely ignoring the fact that skin in translucent and has subsurface scattering and that was why it was looking incredibly dead and weird. I tweaked a few things in the materials graph and boom, she's alive and with blood vessels now). For the rest I just color adjusted a few parts and added the emissive material for the hologram.</p> <p> </p> <div class="lightbox-container"><div class="pswp-gallery lightbox " data-controller="lightbox" data-lightbox-target="container"><div class="lightbox__item"><a target="_blank" data-lightbox-target="item" href="/rails/active_storage/blobs/redirect/eyJfcmFpbHMiOnsibWVzc2FnZSI6IkJBaHBBbkNNIiwiZXhwIjpudWxsLCJwdXIiOiJibG9iX2lkIn19--99923ea3bdad1cb6799a68df3b839987b893f409/Maria.10.png"><img alt="" loading="lazy" src="/rails/active_storage/blobs/redirect/eyJfcmFpbHMiOnsibWVzc2FnZSI6IkJBaHBBbkNNIiwiZXhwIjpudWxsLCJwdXIiOiJibG9iX2lkIn19--99923ea3bdad1cb6799a68df3b839987b893f409/Maria.10.png"></a></div></div></div> <p> </p> <div class="lightbox-container"><div class="pswp-gallery lightbox " data-controller="lightbox" data-lightbox-target="container"><div class="lightbox__item"><a target="_blank" data-lightbox-target="item" href="/rails/active_storage/blobs/redirect/eyJfcmFpbHMiOnsibWVzc2FnZSI6IkJBaHBBbkdNIiwiZXhwIjpudWxsLCJwdXIiOiJibG9iX2lkIn19--2264d95e395723ec60de63ef05f88bf8c7ff335c/Maria.14.png"><img alt="" loading="lazy" src="/rails/active_storage/blobs/redirect/eyJfcmFpbHMiOnsibWVzc2FnZSI6IkJBaHBBbkdNIiwiZXhwIjpudWxsLCJwdXIiOiJibG9iX2lkIn19--2264d95e395723ec60de63ef05f88bf8c7ff335c/Maria.14.png"></a></div></div></div> <p> </p> <p>For the hologram and Sonic cool shirt stamp, I used Photoshop and just had fun painting - those cool bubbles are so cool and all I did was change the mode to Index! </p> <p> </p> <p> </p> <p> </p> <div class="lightbox-container"> <div class="pswp-gallery lightbox " data-controller="lightbox" data-lightbox-target="container"><div class="lightbox__item"><a target="_blank" data-lightbox-target="item" href="/rails/active_storage/blobs/redirect/eyJfcmFpbHMiOnsibWVzc2FnZSI6IkJBaHBBblNNIiwiZXhwIjpudWxsLCJwdXIiOiJibG9iX2lkIn19--2ad88cadd4511c075b3cd9184dfb5369086b3ebe/Sonic%20+%20NOS.png"><img alt="" loading="lazy" src="/rails/active_storage/blobs/redirect/eyJfcmFpbHMiOnsibWVzc2FnZSI6IkJBaHBBblNNIiwiZXhwIjpudWxsLCJwdXIiOiJibG9iX2lkIn19--2ad88cadd4511c075b3cd9184dfb5369086b3ebe/Sonic%20+%20NOS.png"></a></div></div> <div class="pswp-gallery lightbox " data-controller="lightbox" data-lightbox-target="container"><div class="lightbox__item"><a target="_blank" data-lightbox-target="item" href="/rails/active_storage/blobs/redirect/eyJfcmFpbHMiOnsibWVzc2FnZSI6IkJBaHBBbk9NIiwiZXhwIjpudWxsLCJwdXIiOiJibG9iX2lkIn19--a88de7c931c9c7297470b2c80256f0caf321df2c/HologramTextureColor.png"><img alt="" loading="lazy" src="/rails/active_storage/blobs/redirect/eyJfcmFpbHMiOnsibWVzc2FnZSI6IkJBaHBBbk9NIiwiZXhwIjpudWxsLCJwdXIiOiJibG9iX2lkIn19--a88de7c931c9c7297470b2c80256f0caf321df2c/HologramTextureColor.png"></a></div></div> </div> <p> </p> <p>When I finished setting the materials, I reapplied the clay label and started rendering a few shots. I'm very happy with the result, she transmits the confidence I really wanted her to have. </p> <p> </p> <div class="lightbox-container"><div class="pswp-gallery lightbox " data-controller="lightbox" data-lightbox-target="container"><div class="lightbox__item"><a target="_blank" data-lightbox-target="item" href="/rails/active_storage/blobs/redirect/eyJfcmFpbHMiOnsibWVzc2FnZSI6IkJBaHBBbktNIiwiZXhwIjpudWxsLCJwdXIiOiJibG9iX2lkIn19--fc4c5e872822bf2a4c3f7c6f1070f83c1f119332/MariaCloseUpFaceCamera.2.Clay.png"><img alt="" loading="lazy" src="/rails/active_storage/blobs/redirect/eyJfcmFpbHMiOnsibWVzc2FnZSI6IkJBaHBBbktNIiwiZXhwIjpudWxsLCJwdXIiOiJibG9iX2lkIn19--fc4c5e872822bf2a4c3f7c6f1070f83c1f119332/MariaCloseUpFaceCamera.2.Clay.png"></a></div></div></div> <p> </p> <p>Then I untoggled the clay label, adjusted the post process effects (I'm addicted to bloom. Sorry), started rendering with my custom materials and colors and, as you can imagine, that's where I'm at right now. </p> <p> </p> <p>That's it for today. </p> <p> </p> <p>I'm pretty much finished but I still have a few renders to waiting and I can't wait to show you guys! &lt;3</p> <p> </p> <p> </p> <p> </p> </div>
    Avatar for Márcia Costa
    Márcia Costa
  • First Drawings and Character Studies

    The objective here is to imagine possible personas in this world. With their resources at hand, how would they use them, what sort of interaction would they have with the established world and with other people..

    Avatar for Nuno Completo
    Nuno Completo
  • Designing The Main Hologram

    -We go back to where we started, Robo-turtles collecting trash, in the ocean intertwined with other sea creatures. You can also spot my tiny Robo-Fish carrying plastic to the Robo-Trash. 
    -Without any adjustment layers, this will be going to be the look of the main hologram. 

    Avatar for Övgü  Yeles
    Övgü Yeles